The Monstir Plate – DIY Magnetic Stir Plate
I use a stir plate for growing yeast cultures for my beer brewing. Most of my recipes require only a 1.5L batch; however, there are some recipes that call for a larger quantity of yeast and for that I’ve been using a 5L Erlenmeyer flask to grow 3L cultures. My small stir plate wasn’t up to the task of creating a proper vortex for such a size. This is crucial for aeration during yeast growth. A larger stir plate I purchased a few years ago bit the dust recently and I had enough spare parts on hand to build another one using the same case and power supply. The following write-up is a how-to if you plan to build one yourself. There is a lot of room to experiment and try different things. As far as tools go it will help to have a rotary tool (Dremel), a ratcheting PVC cutter, soldering iron, and some strong glue or epoxy.
| LM317 Voltage Regulator |
| 2K Ohm potentiometer w/knob |
| 300 Ohm resistor |
| 0.1 mfd capacitor |
| 9v DC 500mA power supply |
| Panel-mount female power connector |
| PC Case Fan |
| Project Case |
| 1″ dia. PVC pipe – cut to length* |
| Neodymium Rare Earth Magnets 3/8″ dia. by 3/8″ tall |
| Stir Bar |
| 2L Erlenmeyer flask (for small starters) |
| 5L Erlenmeyer flask |
To the left is the parts list for this project. I was rebuilding a broken stir plate so I already had the box, power supply, panel mount jack, and the magnets. I replaced the fan and the electronics. If I do this again I would go with a better, wider project box (the one in the parts list) and I would save myself the soldering time by buying a preassembled motor control for much less than those electronic parts combined. This LM317-based module will do it all and has the bonus of including a heat sink (The LM317 is a linear voltage regulator that dumps a lot of heat when running the stir plate at lower RPMs).
Circuit Diagram
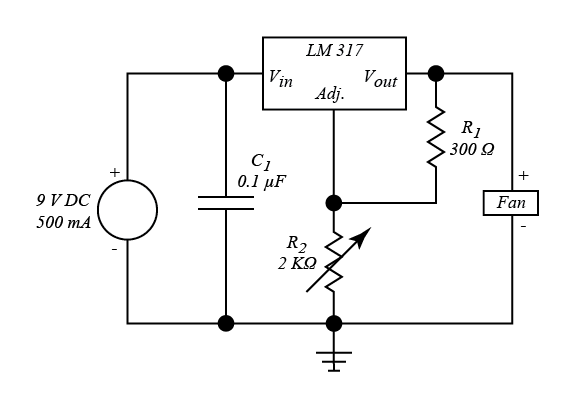
The voltage regulator circuit using the LM317 is shown below. The LM317 can take an input voltage of 3-40V DC and output a fixed voltage from 1.2V to 37V DC. The input voltage is fed to Vin of the IC and the regulated output voltage is available on pin Vout. A resistor network comprising of R1 and R2 connected to the IC adjustment pin provides the regulated output voltage to the fan. C1 is an input filter capacitor. The output voltage of the regulator circuit depends on the equation, Vout = 1.25 [1 + (R2/R1)] + IQ·R2.
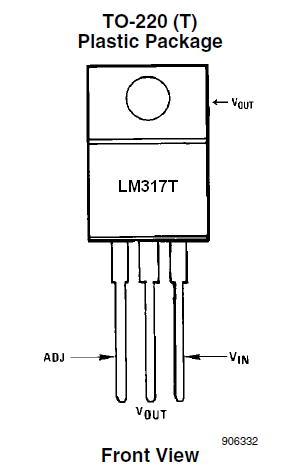
Shown here is the pin-out diagram for my LM317 package. Yours may be different so always check the data sheet that came with it.
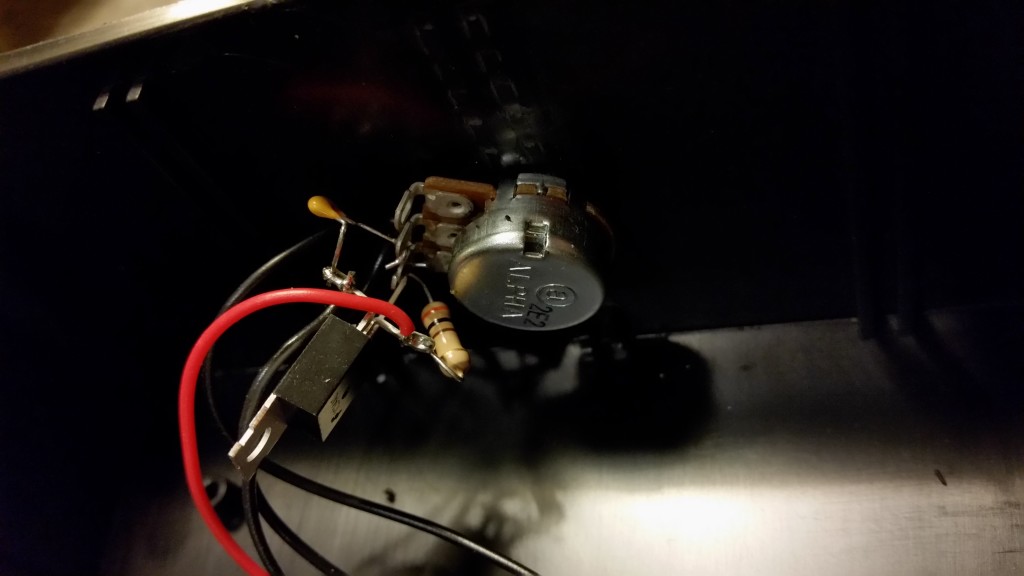
There are so few components involved that using a circuit board is unnecessary. Simply direct-solder all the components together. You end up with an ugly cluster seen in the photo, but it works.
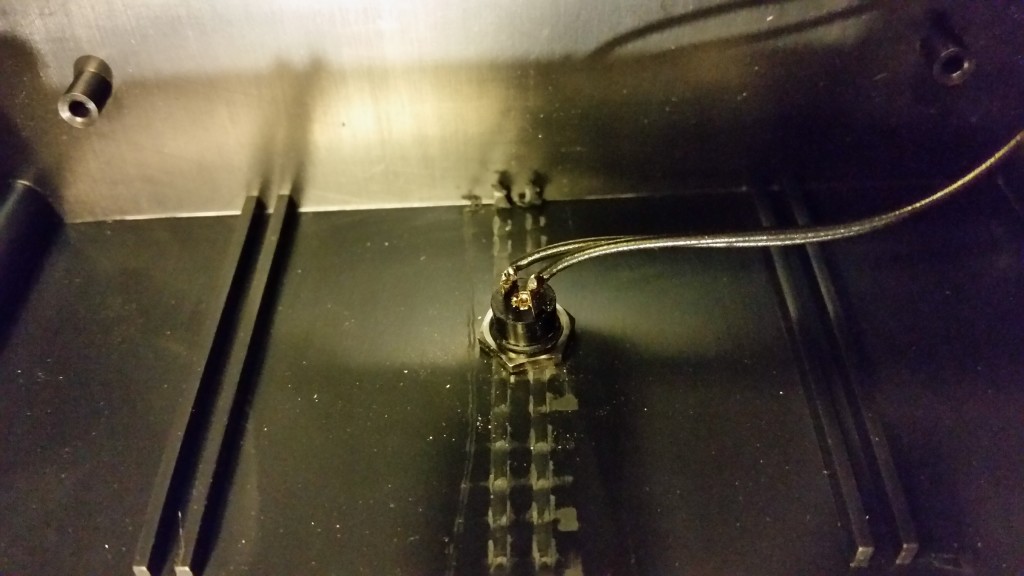
Here I’ve already tested the output and mounted the pot to the case.Shown here are the two wires from the power supply input (jack), also mounted to the case.
After everything has been wired up you may want to test the circuit just to make sure it all works before proceeding.Mounting the Magnets
The next step is to mount the fan into the project case and then to mount the magnets to the fan. First, though, you should think about the length of stir bars you will use. I use 1″ bars since they work great in 90% of the smaller yeast starters I create and as the video shows at the end of this post, they work equally well in larger starters.
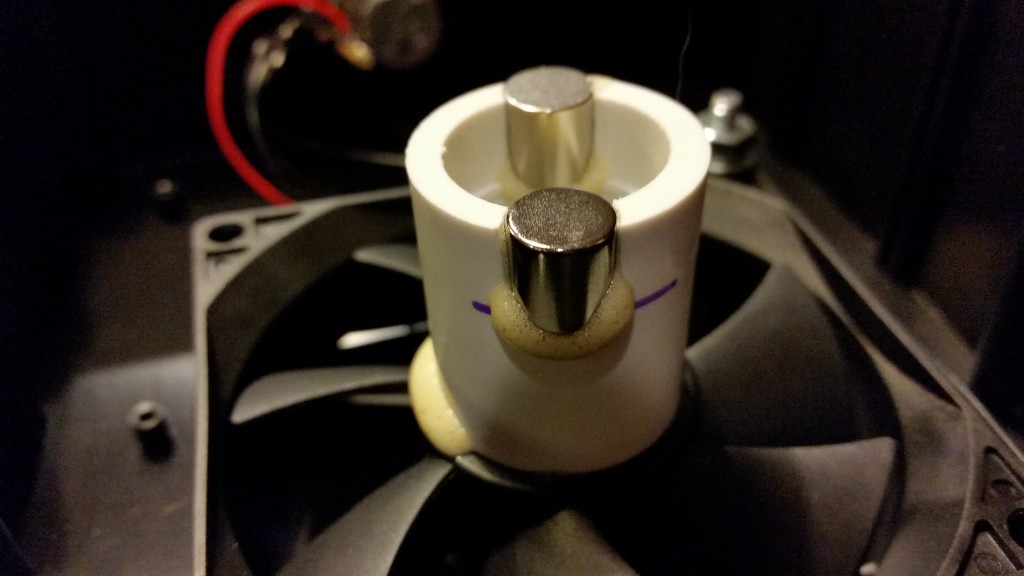
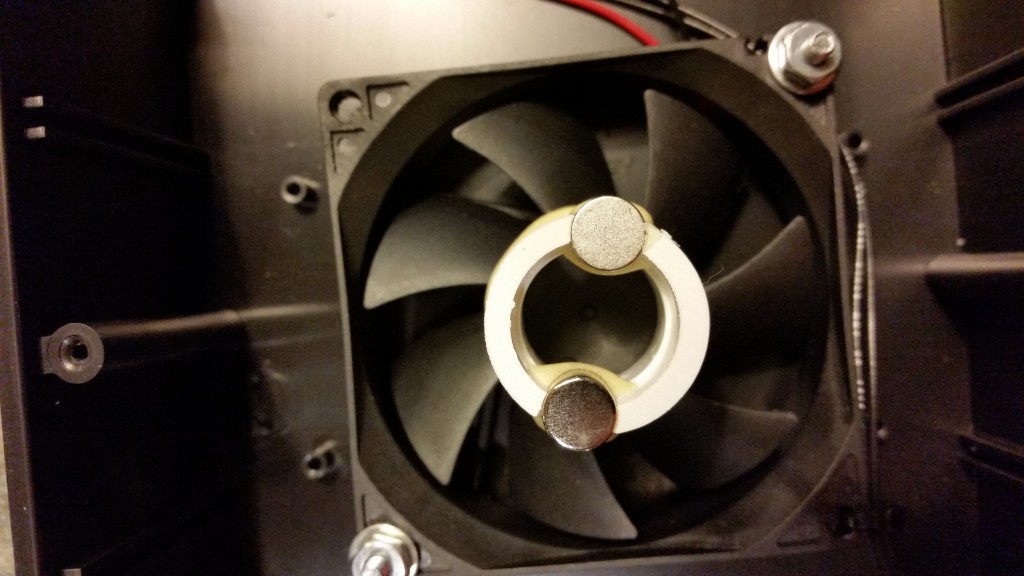
With that settled, I used a 1″ diameter PVC pipe to hold the magnets apart. This pipe is then glued onto the surface of the fan, seen in the image above. It is important to cut the pipe to a length that will place the magnets just below the surface of the case, perhaps even allowing for some sagging that may occur when a large volume of liquid is placed upon it. You can probably get a piece of pipe for next to nothing from the local building supply store, from the scrap bin. You’ll need a few inches at most. The trick in mounting the magnets this way is that you have to cut the pipe cleanly. Though you can cut the PVC with a hack saw it is difficult to get clean, straight cuts.
I have a pair of ratcheting PVC cutters from a previous plumbing job and it does a perfect job of creating perpendicular cuts. They cost about $6 from the hardware store. I used a rotary cutter to create the notches for the two magnets. The magnets are mounted such that the north end of one faces up while the other faces down. Use any strong glue or epoxy to hold them in place and to glue the pipe to the fan, keeping it as centered as much as possible.The video below shows how things operate beneath the box cover.
Finally here is a short clip showing the Monstir Plate in action for my most recent brew.
Recent Comments