The Hackintosh, Part 2: Build And Install
I assume if you’re reading this post then you’ve decided to build your own Hackintosh, or perhaps you’re still considering it. Maybe you just want to get a rough idea of how difficult an endeavor it will be.
Before getting into the build details allow me to write a little about why I chose the hardware listed at the end of Part 1. I mentioned that there are a number of people out there building Hackintoshes and giving feedback on how to do so. That means the hard investigative work of figuring out which items work has already been done. Take a look here for example. That is the OSx86 project wiki showing a list of compatible and tested hardware items for Snow Leopard 10.6.7. You could use this list to purchase the items you want to build a system. Also notice that they provide a list of notebooks and desktop systems that work to various degrees of functionality.
Or you could take an easier way out, dig a little deeper, and find a write up by someone who built a system and listed the specific steps he took. That’s what I did (and hope to pass along). The wonderful Adam Pash, editor-in-chief at LifeHacker.com, recently updated his guide to building a Hackintosh[1] last October. I chose nearly the exact same hardware he did because I knew it would work. I’ve decided to do my own write up for two reasons. First, there have been three updates to Snow Leopard since Adam built his system and his write up doesn’t cover upgrading to the latest 10.6.7. There is a slight change to his procedure that needs to be made. Secondly, I didn’t use the same internal drives and memory he used so I felt I should only list what I used and know to be working.
Much of Adam’s work was taken from guides provided at the TonyMacx86 Blog. That is another source of valuable info and also includes other completely defined Hackintosh systems you may want to consider building, including a Hackintosh “Mini”. I am shamelessly borrowing from both LifeHacker.com and TonyMacx86 in my write up where necessary.
The following is a description of the build process with quite a lot of hardware nuts-and-bolts details omitted. I’ve built several PCs over the years and the process really hasn’t changed. I was able to unpack the boxes of parts and install the motherboard, CPU, video card, memory and internal drives in just under two hours. Although I took a few pictures during the process, I didn’t do so with the purpose of creating a detailed step-by-step guide because there are already so many to be found. Below are some I’ve looked at before writing this post and found to be valuable.
Tom’s Hardware is perhaps the most valuable hardware info site on the ‘net. When you put everything together and discover some part of the system isn’t working, read this before doing anything else.
If you feel overwhelmed putting the hardware together you could probably find a system builder in your area to do the work for you. Even tiny Santa Fe has a few custom build PC shops that would do the work and could even verify all the components were in working order. This would probably add $100 or so to the overall cost of the system.
OK, you have assembled all the parts, tied up all the loose wires, closed the case, and connected the monitor, keyboard and mouse. Time to power it up and see that it all works. If it goes well the system will boot up with some error message that it couldn’t find a boot device or system drive or something to that effect. That’s because you haven’t installed any such system yet. You should, however, be presented with the option to go into the BIOS settings of the system. We’ll get to that in a minute.
There are several software packages and tools needed in order to install Snow Leopard onto this system. In addition to a Snow Leopard Retail DVD you need the following.
- Snow Leopard Combo Update 10.6.7
- iBoot universal boot tool
- MultiBeast post-install bootup tool
There are a few other files known as kernel extensions (kexts) that are needed post-install. These are drivers that tell Snow Leopard how to make use of the hardware but don’t come standard on the Snow Leopard distribution from Apple. Adam Pash put these together in a single zip file for downloading[2].
- Kext Utility – A tool for installing the kext files.
- RealtekR1000SL.kext – enables the on board network chipset.
- VoodooHDA.kext – enables the on board audio subsystem
- FakeSMC.kext – an open-source System Management Controller (SMC) emulator for MAC OS X. This emulator fools Snow Leoopard into thinking it’s running on Apple Hardware.
- NullCPUPowerManagement.kext – An extra kext to kill (nullify) Apple’s CPU power management schemes. Without this kext you will have to find the magical CPU power settings in your system BIOS to match what Snow Leopard thinks your system supports. Only a few smart and/or lucky few have been able to figure this out. Most people (including myself) only get a system that boots and immediately panics (locks up) if we do not add this kext. The downside is that you get a system that can’t be put into sleep mode. (Doesn’t affect monitor and hard drive sleeping.) I don’t use sleep mode for desktops so this doesn’t bother me.
- UpstreamDisabler.kext – This is another open-source tool to block certain DRM features of Apple’s OS that prevents you from sharing iTunes files over a network.
Cautionary note: There is a relatively new file for use with previous versions of Snow Leopard called SleepEnabler.kext included with this zip file. This kext restores the ability to put the system to sleep but does not work with the latest 10.6.7 upgrade. In short, don’t use this kext.
With the exception of the iBoot.zip file place all of these files on a USB drive. You will need them later and a USB drive will be the most convenient means of accessing them.
You need to create a disc that will allow you to boot the system into a usable configuration, one in which the Snow Leopard install DVD is able to think it is being launched by Apple’s bootloader. This is a temporary setup. When finished you will not need this disc to boot up the final system. Do keep it around for future upgrades, however.
Unzip the iBoot.zip file and extract iBoot.iso. Burn this image file to a CD or DVD. It is a really small file so don’t waste an entire DVD blank if you don’t need to.
Here are Adam’s instructions for burning the ISO in case you’ve never done so before.
In Windows: Insert a blank disc, right-click iBoot.iso, and click Burn disc image. Select your disc burner in the next Windows prompt, and hit Burn.
On OS X: Insert a blank disc, open Disk Utility (/Applications/Utilities/Disk Utility.app), drag and drop iBoot.iso into the sidebar, and click Burn.
Finally, onto the good stuff. Abandon all hope ye that enter here, or grab a beer and relax. You’re going to install Snow Leopard onto your naked hardware.
Change BIOS settings
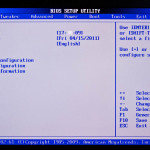
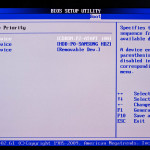
To get into the BIOS settings power up the system and press the delete key when you see the screen at left. You could press the delete key after hearing the first system beep during the power-on phase.Eventually you will see a screen like the one to the right. You’re in. If you get an error that the system is unable to boot then you may have waited too long to press the delete key. Try again, you’ll get it. 1. On the first BIOS screen, press the down arrow key to the entry labeled
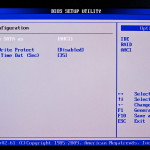
Storage Configuration. Hit Enter. Change Configure SATA as to AHCI. Press Escape once to get back to the previous menu.
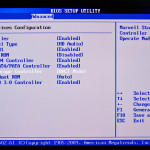
2. Press the right arrow key to reach the Advanced tab, then the down arrow key to the section labeled Onboard Devices Configuration. Hit Enter. Find the Marvell 9123 SATA Controller entry, and set it to AHCI. Press Escape once to return to the previous menu.
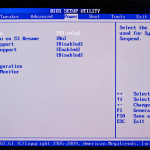
3. Press the right arrow key to reach the Power section and set Suspend Mode to S3 only.
4. Press the right arrow key to reach the Boot tab, hit Enter on Boot Device Priority, and set your first boot device to boot first from your CD/DVD drive, then set your primary hard drive as the second boot device.
Removable Dev in case I ever need to boot from such a device.
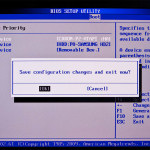
5. Press F10 to save these settings and exit the boot menu.
What you have just done is to configure the system initialization to use the Advance Host Controller Interface (AHCI) features built into the on board SATA controller and make use of sophisticated SATA drive capabilities. This wasn’t done purely for performance reasons – Snow Leopard expects this capability to be in place. The other settings changed were to the devices checked in order to boot up the system and the order checked, and you set a power setting that tells the system how to behave if put to sleep. The setting was set to match what Apple expects.
If you are using a different motherboard the specific steps above will likely be different but you should still have some way of making these same settings as we did. You will have to read your motherboard’s manual to find the exact instructions.
Install Snow Leopard
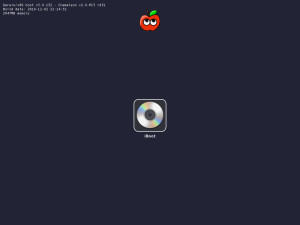
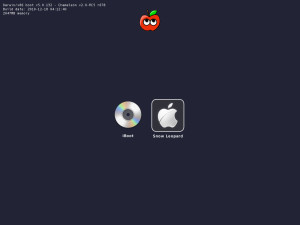
This is where you need the iBoot disc you burned previously. Power up the system and put it in the CD/DVD drive. Since you set the CD/DVD drive to be the first device checked in the BIOS settings above, it should be detected and you’ll be launched into the iBoot bootloader application. When it is ready you should see a screen that looks like this.
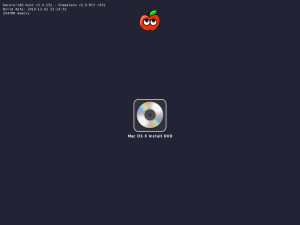
Now eject the disc and put in your Snow Leopard install DVD. After the DVD is loaded, press the F5 key. The iBoot screen should refresh and display the option to boot from the DVD.
Press Enter to begin the process of installing Snow Leopard. When you get to the installation screen, be sure to open Utilities/Disk Utility from the menu along the top of the screen. This is so we can format the hard drive. Format your hard drive using the Mac OS Extended (Journaled) option.
Cautionary Note: I have two 2TB internal drives in my system. I intended to put Snow Leopard on the first drive as one full 2TB partition. It turns out that the boot loader that gets put in place will not recognize partitions over 1TB in size. If your drive is larger than 1TB then you will need to split it up into two partitions using Disk Utility. Make the primary partition 1TB or smaller and the second partition can be whatever remains.
For the purposes of this guide, name the primary partition Snow Leopard. You can rename it later when you’re finished. If you have a second partition, give it any name you want. The drive formatting should take around a minute, probably less.
Close Disk Utility when it finishes.
When the installer asks you where to install, choose Snow Leopard.
Click all the options in order to continue and let the install process begin. It takes some time, around 30 minutes more or less.
When the install finishes, restart the computer. IMPORTANT: Place the iBoot disc back in the CD/DVD drive. It is still needed at this step in order to boot into your fresh Snow Leopard install.
Cautionary Note: Some people see an error message at the end of the Snow Leopard install that the system was unable to install itself. According to Adam Pash, “Don’t panic!” This happens often. You only need to click restart and put the iBoot disc back in the drive and let it boot the system.
Now when you get into the iBoot loader you should see a screen like this (even if you got the error message at the end of the install).
Simply choose your Snow Leopard installation and watch your system boot up. Go through the setup wizard and create the default settings, account, etc. You can skip setting up the network for now. (You need to install a kext to enable the Ethernet interface anyway.)
At the end you will be logged into your Snow Leopard system. Don’t go off and start having fun just yet. Now it’s time to upgrade to 10.6.7 as well as make some other changes, notably to install a permanent boot loader onto your drive so you do not have to use the iBoot disc each time you turn on your system.
Insert the USB drive containing the files mentioned at the start of this post, the one containing the 10.6.7 combo update as well as the kext tools and files. Double click on the 10.6.7 update image to mount it. Click on the 10.6.7 update installer package and run the installer.
IMPORTANT: When the installer finishes it will prompt you to restart the computer – DO NOT RESTART YET.
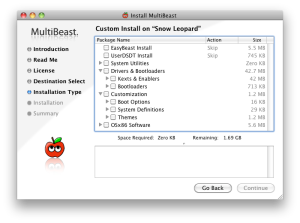
Next find the MultiBeast application you saved onto the USB drive and launch it. You should see this screen.
On the Install MultiBeast screen check the boxes for EasyBeast Install and System Utilities, leaving the other boxes unchecked. Click Continue to install. When the EasyBeast installation completes, eject the iBoot disc and restart your computer. It should now boot directly into your Snow Leopard installation without the aid of the iBoot disc.
Cautionary Note: For me and others, the MultiBeast tool crashes the first or second time you go to launch it. Simply relaunch and do the steps above until it installs and then restart the system.
The computer has now restarted and you are in your Snow Leopard 10.6.7 OS. The final step is to install a few kext files to enable some of the system hardware.
Unzip the post_install.zip file if you haven’t done so already. Go into the Post Install folder and then into the Extra/Extensions folder. In a separate Finder window, navigate to the /Extra/Extensions folder at the root of your system drive. Now drag the following files from your USB drive’s Extra/Extensions folder into your system drive’s Extra/Extensions folder.
- FakeSMC.kext
- NullCPUPowerManagement.kext
- UpstreamDisabler.kext
Note that we are excluding the SleepEnabler.kext file. As mentioned previously this kext does not work under 10.6.7 and will cause your OS to panic and lock up.
Finally, go back to the Post Install folder on your USB drive. There are three files we need: The Kext Utility and two kext files (VoodooHDA.kext and RealtekR1000SL.kext).
Drag and drop VoodooHDA.kext onto Kext Utility and enter your password when prompted. When it says, “Done”, quit Kext Utility by clicking Cancel.
Now drag and drop RealtekR1000SL.kext onto Kext Utility and repeat the process above.
Restart your system and you should be all set up to go and enjoy your Hackintosh. You may want to add more drives or other hardware; plug your system into your network and set that up; or just plug in a set of speakers and be done.
Whatever you do, DO NOT run or install any updates from running Apple’s Software Update. Check with the various websites I’ve given to see what other people have discovered to work, what breaks and what the new fixes are. You may want to install an update only if it solves a particular problem you have.
On my system I’ve successfully added my Epson printer, Harmon-Kardon Sounstick II speakers, Wacom pen tablet and my Epson flatbed scanner. Everything seems to work thus far.
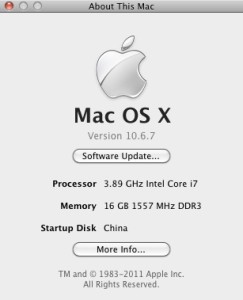
Here’s what my system displays when I click on the Apple logo in the upper left corner and select About This Mac.
[1] March 2016 update: The original link no longer exists and now points to Adam’s basic Hackintosh links.
[2] March 2016 update: The original link no longer works but I’m guessing you don’t really need it. You’re building a much more modern Hackintosh, right?


Recent Comments